8.2.12 Abandoned Test Grid
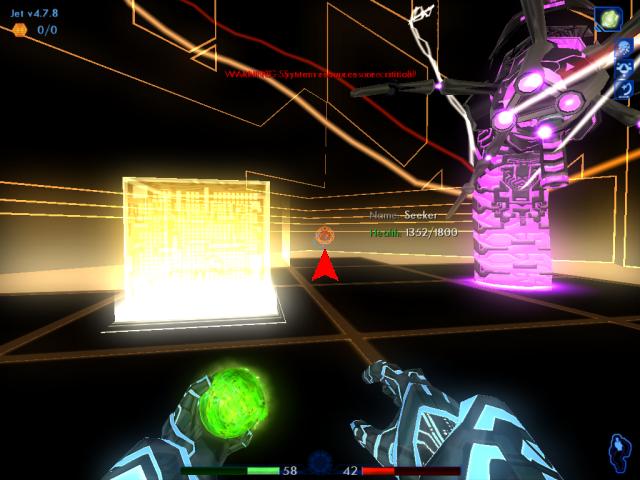
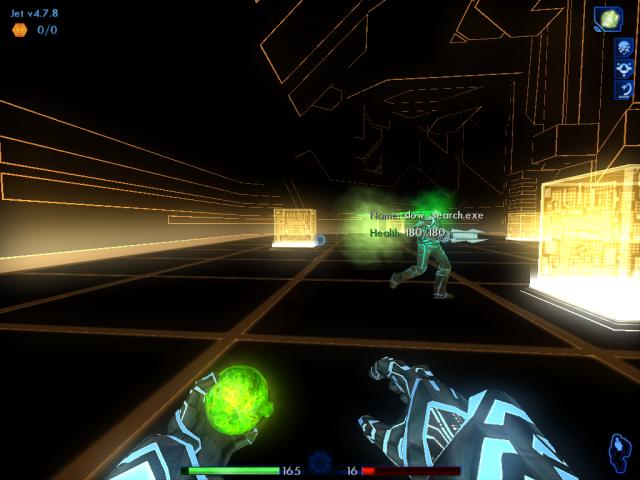
Jet arrives in a section of the Encom mainframe, that is completely abandoned. It's an old game test grid. The Seeker has followed, which means Ma3a is no longer in danger. Unfortunately though, now you have to deal with this monster.

The first thing you will be greeted by, is the system memory screen. You've entered a new system, so your subroutines need to be reconfigured. Because this mainframe is old, your memory slots are more limited.
Here is a suggested configuration. Two subroutines that you should definitely have installed, are Corrode and the Profiler. Corrode will continue to do damage after the Seeker has been hit, and the Profiler will help tell you how much health the Seeker still has.
Up until now, I haven't bothered with armor subroutines. They take up too many memory slots, and don't help a whole lot unless they're at Gold level. But now, they will actually prove somewhat useful. You are in an enclosed room, with few places to run. So having armor, will help lessen the damage you take. Truncate and Submask offer the most protection, so equip those. Press the F1 key to exit this screen.
|

There are only two weapons you should use in this level. Either the Ball Primitive, or the Disc Primitive. Forget the rest.
Why? The Ball gives you the best punch, for your energy spent. The Seeker seems particularly vulnerable to any form of the Ball. The Disc does less damage, but then again it also uses no energy. (However, with Corrode installed, even the Disc uses a little.) I recommend the Ball, however.
Do both a Quick Save and a Regular Save now, before the Seeker submerges below the floor and moves to a new location. You want to do a Regular Save, because just in case you quick save at a bad point, you can come back. (Though you could also use the Autosave.)
|

The trick to beating the Seeker consists of two things: using the Profiler, and patience.
The Profiler will show you how much health the Seeker still has, so you can get an idea of how much longer until it dies. There's no "boss bar" to show you the Seeker's health.
|

|
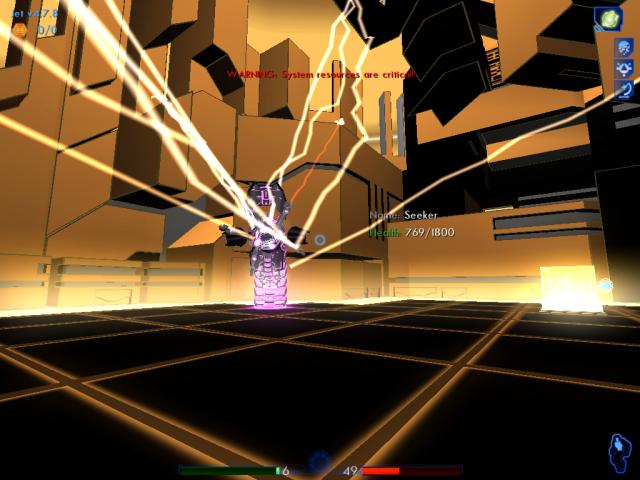
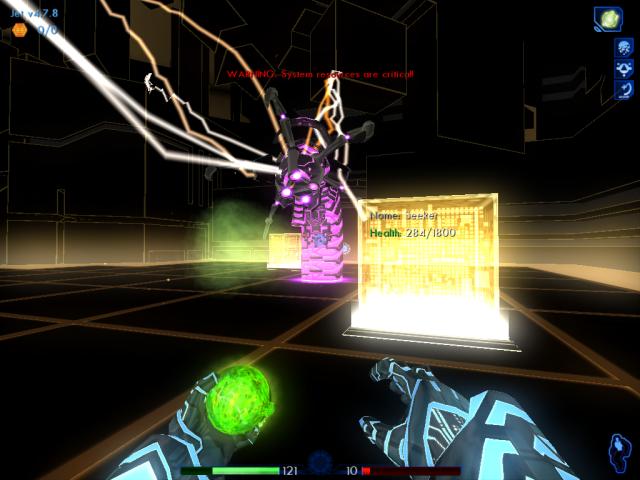
After you pound the Seeker for a while, your fighting will cause the system to overload. Since you're in an ancient computer by today's standards, two large complex programs fighting it out is bringing the computer to its proverbial knees.
|

This will cause the Seeker to seize up.
Now's your chance to run to either end of the grid, to use one of the patch routines. Right now, energy is probably more important if you were careful and dodged the Seeker's blasts.
|

On this particular level, energy is life. You must keep recharging continually. Without energy, you are dead.
If the Seeker doesn't get you . . .
|

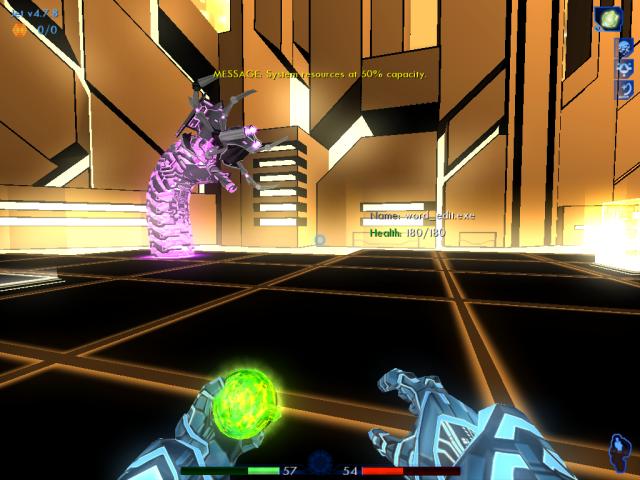
Resource Hogs will.
Resource Hogs are bloated programs that require a lot of energy and processing power to exist. Your presence here is denying them what they want, when you overload the system. So they intend to do something about that!
Notice that every time you cause the Seeker to freeze, three Hogs will appear. They also generally rezz in at the same locations, so if you keep an eye out you'll discover where these points are.
|
|
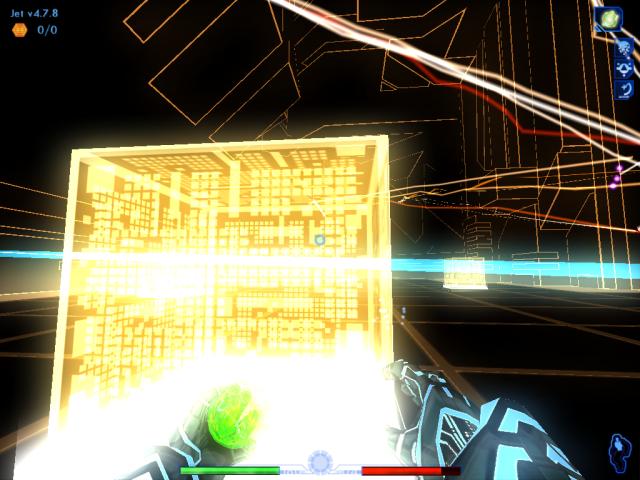
You can use these interesting energy cubes as a shield from their Suffusion blasts, while you fight back.
|

Every time you de-rezz a Hog, he will explode in an enormous display of crackling energy. You'll want to keep your distance when a Hog explodes. Wait a moment for the energy discharges to dissipate, and then you can move in to collect the core dump.
As you can imagine, Hog core dumps often contain more health and energy than your average program. They're pretty valuable, in fact.
|

|
So make sure to grab as many Hog core dumps, as you can.
|

|
After the last Hog is gone, the Seeker will come to life again for round two.
|

|
Make sure that you don't get too close to the purple energy trail it leaves behind on the floor, when it goes under. You will instantly die, if you touch it.
|

|
Again, you can use the cubes as cover when the Seeker fires at you.
|

Watch out when the cube is destroyed, though. Get moving fast, if this happens.
Note that the cubes constantly regenerate, so you will always have some cover to hide behind.
|

|
Keep firing away at the Seeker, until it freezes again.
|
|
You should probably alternate between the energy and health patches, so head for the other one this time.
|

|
Restore your health, but be mindful of the Hogs that will appear again. If they are hitting you while you charge, you'll have to break off and attack them.
|

Blow them up, but be careful not to get caught in the explosions yourself.
A tactic you can use, to have a better chance of recharging in peace, is to take out two of the three Hogs that appear each time. That way, you can lead the remaining Hog around the level, and then run for the patch that interests you . . . while he struggles to catch up. Hogs move quite slowly.
|

After the Hogs are eliminated, grab their cores.
You may want to do a Quick Save now, but only if you're in good shape.
|
|
You know the drill. It's round three. Let the Seeker have it.
|

|
When the Seeker freezes up, again alternate and head for the energy patch . . . unless you are hurting for health.
|
|
Recharge, then look for more Resource Hogs.
|
As before, blow them up while being careful of their shots. The Hogs use the Suffusion Rod with surprising effectiveness. 
|

|
After all the Hogs are gone, resume your attack on the Seeker in round four.
|
|
Of course, it will seize up yet again.
|
|
At this point, you may want to concentrate on replenishing health. The action is getting a little more hectic by now.
|
Now trash some more Hogs.
Quick save again, if you think you're doing okay.
|

Round five. Cycle. Rinse. Repeat. 
|
|
The Seeker will freeze again, as usual.
|
|
Use whichever patch you need most, be it health or energy.
|

|
Mop up some more Resource Hogs.
|

|
Remember to keep grabbing their cores, for an extra boost.
|

|
Pound the Seeker one final time in round six . . . at last, it's almost dead!
|

Finally! That damn nuisance is gone. You earn ten build points for destroying the Seeker.
There are no build notes on this level, as indicated at the top left of the screen. So you don't have to worry about missing any. Good thing too, because it would be a bit difficult to try finding one while constantly being attacked.
4.8.8
|

After the Seeker dies, it leaves something behind.
Jet picks it up in a cutscene, and studies it. It's a Mesh Blaster primitive.
|

|
Just then, the floor disappears under his feet.
|

|
Whoa!
|

Final build version for this level: 4.8.8