By TronFAQ (aka redrain85), with big thanks to 9VoltChicken and Ocelot
The following instructions should allow Mac users to successfully run most Custom Maps (and perhaps even Mods, at some point) from the PC version, on the Mac version of
Before going any further, the first thing you will need is Custom Maps that you wish to try using in the Mac version.
For all of the maps released so far, visit the 6.1 Disc Arena/Disc Tournament, 6.2 Light Cycles, and 6.3 Derez/Team Derez sections for reviews that include download links, screenshots, descriptions, and ratings.
UPDATE: Specially prepared Light Cycle and Disc Arena/Derez map packs containing all released custom maps, have now been created for use in conjunction with the third approach mentioned below. Scroll down to read more, and find download links to the map packs.
Once downloaded, you will need a program like StuffIt Expander that can open .zip and .rar files, in order to extract the contents.
There are three approaches you can take, to getting maps for the PC version, working on the Mac version. One way requires editing a file, that will allow you to use the .rez form that maps and mods usually come in (after they're extracted from a .zip or .rar). A second way is to extract the files from inside the .rez, without needing to edit anything. The third way, is to use specially prepared map pack .rez files (for which you can find download links, below). Of all the three approaches: the third one is by far the easiest to implement, and will probably be the one that most Mac owners choose to follow.
As you may have noticed, we haven't discussed Mods yet. Mods have been tested . . . but so far, could not be made to work reliably. Until a reliable method of getting them to work can be found, it seems that using mods on the Mac version of
Note that sometimes the maps (or mods) come in Windows executable form. If so, you will need to contact the map (or mod) author: so the author can provide you with files in an extracted or .rez form, instead.
First approach - Using the original PC Map (or Mod) .rez files, and editing the config file
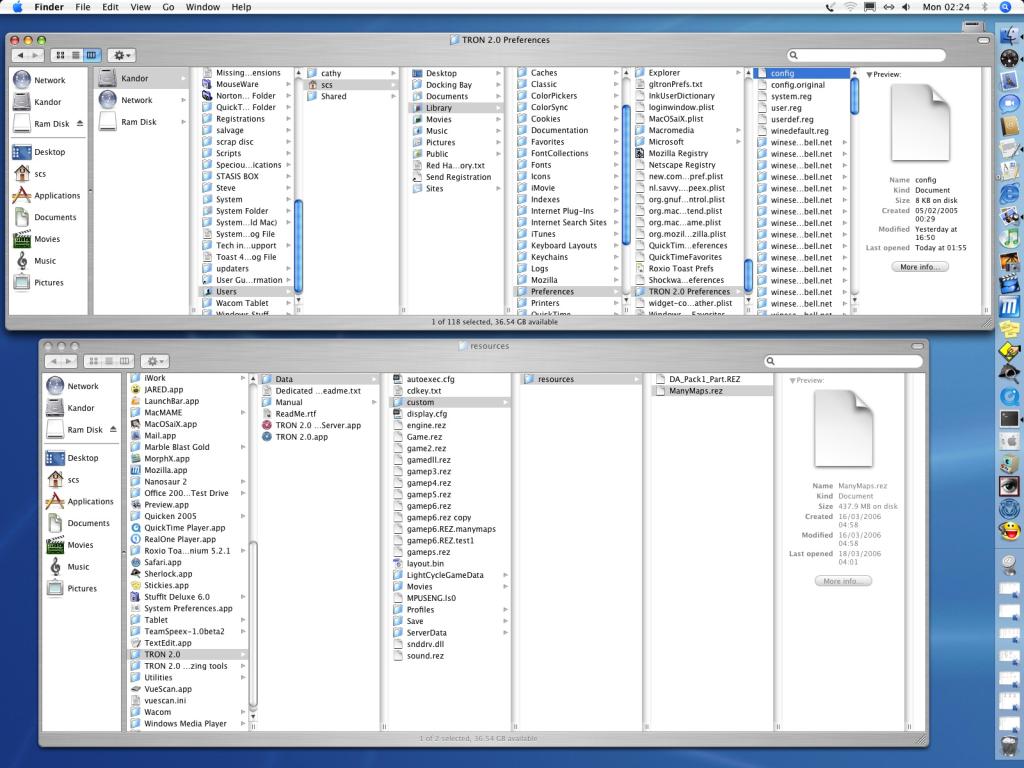
- Inside the directory Users/Account/Library/Preferences/TRON 2.0 Preferences there's a file called config, and it holds some parameters that we want to edit. Account is the name of the User Account that the game has been installed under.
- Before you begin editing the file, make a backup copy first. That way, you can overwrite any changes you made later, and restore the file back to the way it was.
- If you load the config file into a text editor and scroll to the very bottom, you'll see a section that looks like this . . .
[AppDefaults\\lithtech\\transgaming]
"cmdlineadd" = "-rez gameps.rez -rez GAME.rez -rez GAME2.rez -rez GAMEdll.rez -rez Sound.rez -rez GAMEl.rez -rez custom -rez GAMEp.rez -rez GAMEp2.rez -rez gamep3.rez -rez gamep4.rez -rez Engine.rez -rez gamep5.rez -rez gamep6.rez +multiplayer 0 +DisableMusic 0 +DisableSound 0 +DisableTripBuf 0 +DisableHardwareCursor 0 +DisableHardwareSound 1 +DisableSoundFilters 0 -workingdir F:\\"
- Try changing this section to read . . .
[AppDefaults\\lithtech\\transgaming]
"cmdlineadd" = "-rez gameps.rez -rez GAME.rez -rez GAME2.rez -rez GAMEdll.rez -rez Sound.rez -rez GAMEl.rez -rez custom -rez GAMEp.rez -rez GAMEp2.rez -rez gamep3.rez -rez gamep4.rez -rez Engine.rez -rez gamep5.rez -rez gamep6.rez -rez Custom\\Resources\\RezName.rez +multiplayer 0 +DisableMusic 0 +DisableSound 0 +DisableMovies 1 +DisableTripBuf 0 +DisableHardwareCursor 0 +DisableHardwareSound 1 +DisableSoundFilters 0 -workingdir F:\\"
Notice that the entries -rez Custom\\Resources\\RezName.rez and +DisableMovies 1 have been added. Replace RezName with the name of the .rez file you want to try using. The +DisableMovies 1 entry was inlcuded as a side benefit, to disable the (what many would consider) annoying introduction movies that appear every time the game is run (BVG, Monolith, nVidia, MacPlay, TransGaming). Now, save the changes you've made.
- Inside the directory Applications/TRON 2.0/Data, create a folder called Custom. Inside that folder, create another one called Resources. Place the map (or mod) .rez file you wish to try, inside the Resources folder.
- Now try playing the map (or mod), in the game.
- If your attempt didn't succeed, restore the copy of the config file you made earlier, using it to overwrite the edited version.
- If your attempt succeeded, you will likely only be able to add one .rez file at a time, to the config file. Which means you will have to manually edit the config file, every time you want to use different maps. You could try adding one or more -rez Custom\\Resources\\RezName.rez entries though, and see if more than one at the same time will work.
Second approach - Using the files extracted from a Map .rez
- On the PC we have a program called WinRez LT with a friendly GUI interface, that allows us to extract the contents of map and mod .rez files. After doing some searching, the author discovered a Java-based program called Game Extractor that will allow Mac users to do the same thing. Download the free Basic version of Game Extractor and install it, before continuing.
- Inside the directory Applications/TRON 2.0/Data, create a folder called Custom.
- Run the Game Extractor program from the command line, as outlined in the _Readme_GameExtractor.txt file that comes with the program.
- After running the program, click the Options button located near the bottom right of the window.
- Use the drop-down menu labelled File List, and change the setting to Tree.

- Now use the drop-down menu which is currently labelled Appearance, and select General Settings instead.
- Click on the Choose button, and use the file dialog to navigate to the Custom folder you created earlier, then click the Save button in the file dialog.
The directory should be Applications/TRON 2.0/Data/Custom.

- Click the large Save Options button located above all the smaller buttons, to make the changes permanent.
- Click the small Open Archive button.
- In the file list that appears above, navigate to where the .rez file is located and double click on it.

- Select the Extract Files button.

- Now click the large Extract All Files button at the top of the screen.
- All the map files should have been extracted from the .rez, into the Custom folder.
- Now try playing the map in the game. It should work.

Third approach (the easiest way) - Using specially prepared .rez Map Packs for the Mac
- This is an extremely easy method of using the custom maps made for the PC version of
 , on the Mac version of the game.
- Download the following specially prepared map packs, for the Mac:
LC Map Pack
346 MB, contains all current custom Light Cycle maps, by various authors
DA and DM Map Pack
109 MB, contains all current custom Disc Arena and Derez maps except Capture the Bit (CTB2 TDM), by various authors
Updated Capture the Bit (aka CTB2 TDM)
27.9 MB, specially prepared version of the Capture the Bit Team Derez map for the Mac, by tronfaq [LDSO]
NOTE: Using a file download manager to download these files, is strongly advised.
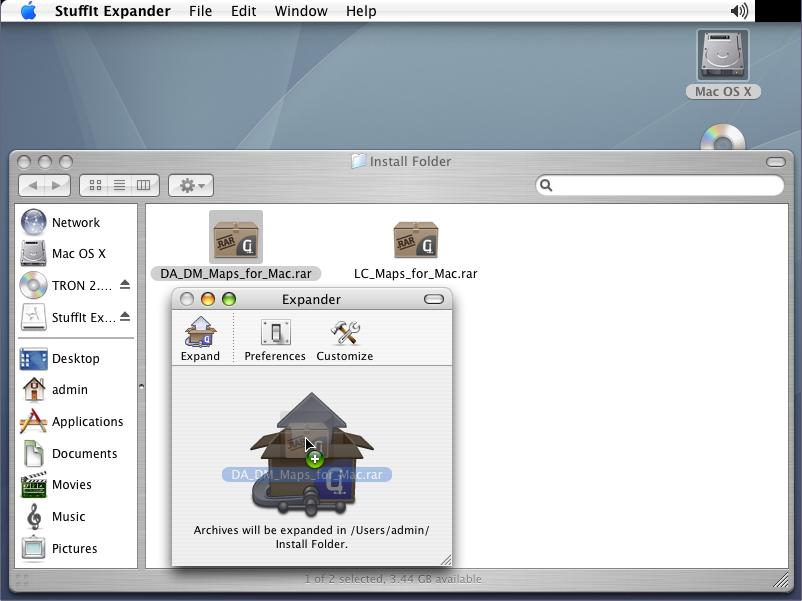
- Drag and drop each .rar file from the Finder on to the Stuffit window, one at a time. The program will decompress each file. The Preferences button allows you to customize which directory the decompressed files will end up in.

- Once both files have been decompressed, use the Finder window to navigate to the directory where they're located. Then open another new Finder window, and view your Applications directory. Change the view to Columns mode. Click on the TRON 2.0 folder, then the Data folder. Highlight both the gamep5.rez and gamep6.rez files with your mouse.
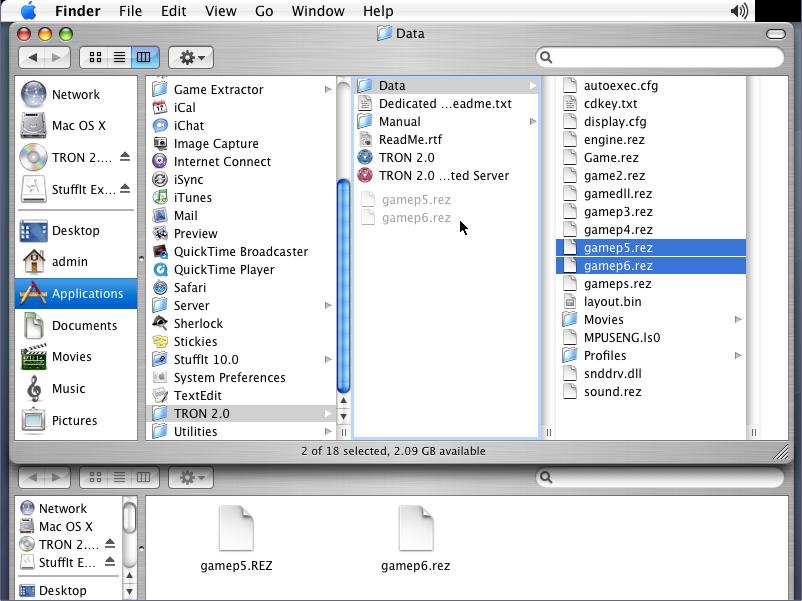
- Drag and drop these two files, into the parent TRON 2.0 folder. This will move them safely out of the way, to be kept as backups in case you ever want to return to your original install state.
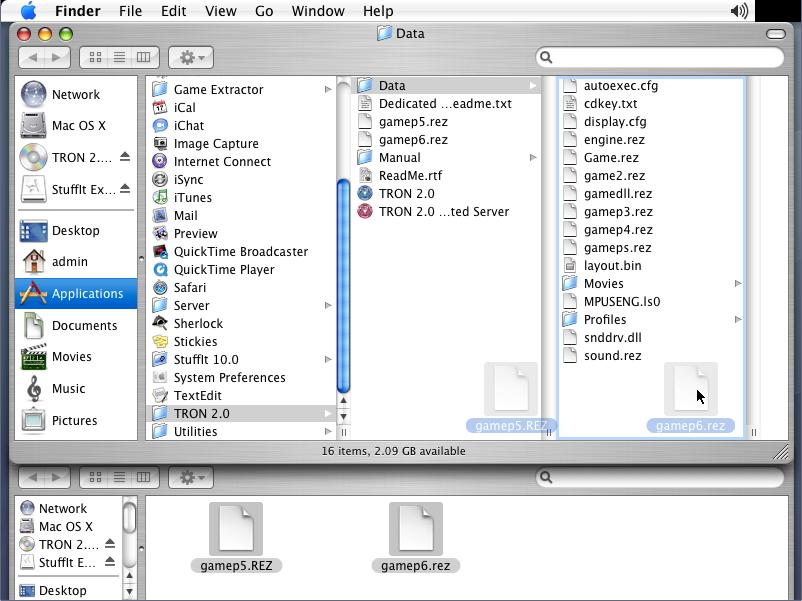
- Now highlight the two .rez files that you extracted earlier, in the original Finder window. Drag them to the column for the Data folder.
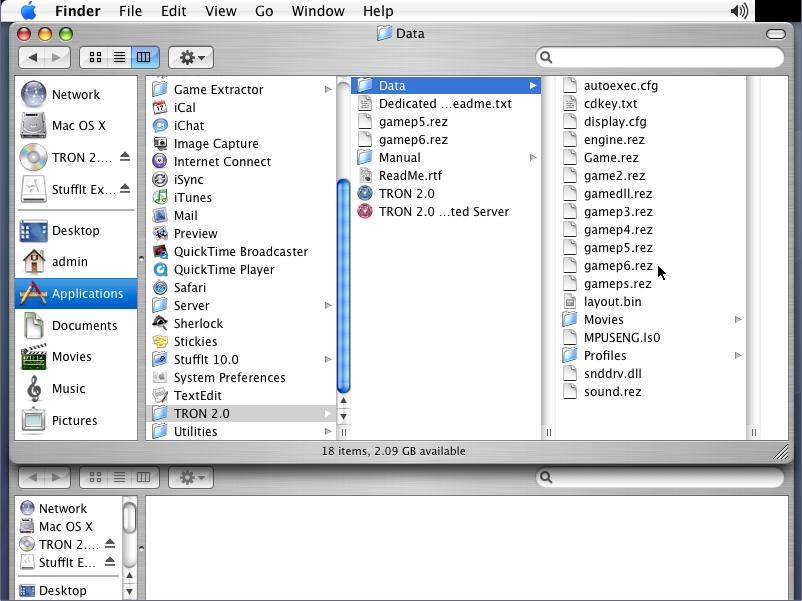
- Finally, drop them in the Data folder. These two files are replacements for the original gamep5.rez and gamep6.rez files.
That's it! That's all there is to it, to making custom
These replacement files will not affect the game in any way, other than allowing you to play custom maps in addition to the default retail maps. These specially prepared .rez file custom map packs, created on a PC, are completely compatible with the Mac version. That's because